
Pouring resin is a bit less friendly than plaster – it irritates the eyes, and is harmful if inhaled, and the catalyst is even worse on both counts. Because of these issues, goggles, a respirator, and gloves are necessary (and a labcoat, of course). Pouring resin takes a number of mostly simple steps. First, removing any remaining resin fragments from the last pour is a necessity. A cheap cup can be used on a scale which reads to the hundredths place (and expect it to get messy - you will drip resin and silicone during mold making onto the scale), and make sure to tear off. The appropriate catalyst needs to be measured in tiny increments, and if you need under 10ml, you’ll be able to count the number of drops of catalyst going into the cup. Too much catalyst – particularly for batches of resin over 10-20ml – and the mixture will heat up and potentially catch fire.

Freshly poured resin cures in the mold.
After pouring the resin, carefully mix (so as not to introduce air bubbles) with a popsicle stick or tongue depressor, and then mix in any pigment (otherwise, the cast will be slightly translucent; surface details will be less evident unless a solid color pigment is mixed in). When mixed, two techniques can be used for filling the mold: a straight pour, or a thin layer can be painted into the mold. Painting a thin layer was necessary in order to fill all the cusps at the base of the crown of this tooth. After the cast is poured, it will take about 45-60 minutes to cure. After about 30-45 minutes, it will be solid enough to remove; if it is still warm and slightly pliable, then trimming it with an X-acto knife will be possible (and next to impossible if it is totally cured). However, if it is too pliable, then holding the cast while trimming it can leave imprints of your fingerprints in the resin.
After a couple weeks of molding and casting, now I have more than ten high quality casts of the Pelagiarctos tooth. I’ll be able to send the mold and the original specimen back to Wyoming, and casts to numerous institutions including UCMP (Berkeley), the LA County museum, Cooper Center (Orange County), San Diego Natural History Museum, Smithsonian, and probably the National Museum of Nature and Science in Tokyo (pretty much to any museum where fossil walruses – or walrus researchers – exist).

Unfortunately I don't have any more photos from the casting process; your gloves tend to get pretty sticky from resin and catalyst, and I wouldn't bother ruining an expensive camera just so you guys can have a couple extra photos (no offense). Anyway, here's the finished product - two test casts and a bunch of resin casts (there are even more now).
This isn't the end of the molding and casting, however; we've gotten a hold of a modern New Zealand sea lion skull, currently loaned to us from Steve Dawson over in Marine Sciences, who has graciously allowed Carol to take a premolar and section it (for science). With this, we'll have teeth of the NZ fur seal (Arctocephalus forsteri) and the sea lion (Phocarctos hookeri) for SEM comparison with Pelagiarctos thomasi. Steve knew that we have the capability of making high quality molds and casts, so he said it would be alright if we molded and casted the tooth first. Here are some photos from the second mold.

Silicone is poured into the acetate dam, around the tooth. Trust me, it's buried in there.

We're left with a solid cylinder of silicone with a tooth buried in the middle, and a
clay plug on one end.
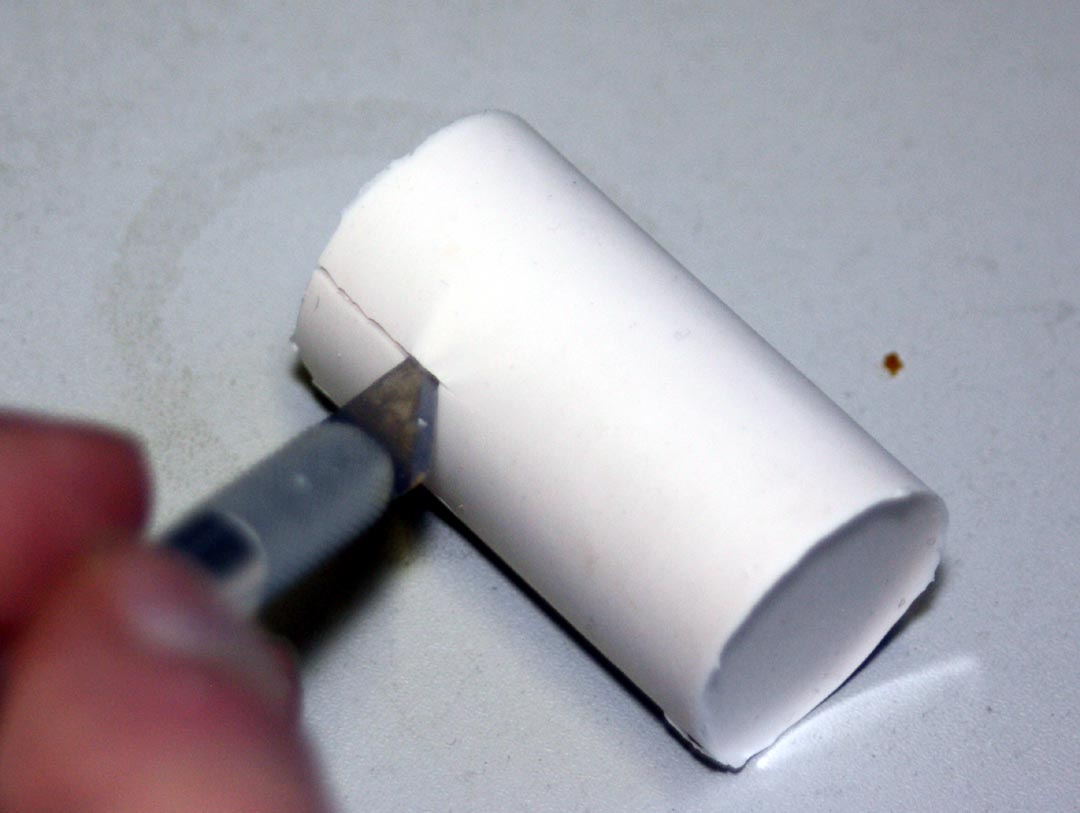
An X-acto knife is used to make a planar cut so that the mold can be split and the tooth (and later, casts) can be removed. In order to cut everything, the two halves can be gently pulled apart in order to see the remaining uncut portions of mold. It's probably important to be careful here and not end up with a ragged seam line, as that can add quite a large amount of 'flashing' (paper-thin amounts of resin that fill in the seams, which you can see on plastic model parts and cheap green plastic army men).

The clay plug is removed...

...to show the root of the tooth.

And Voila! The tooth is removed, with a great mold left. I've made several casts of this
specimen and they've all turned out great.
3 comments:
Hey Bobby-
Is there a chapter 1 of this?... I can't find it on the blog.
Nevermind.. I found it, but it is not listed on the right hand column of the page...
Possibly because it lists posts by month, and this post was in August while the last one was in July. It no longer just lists the last umpteen posts.
Anyway, you'll have a nice mold, cast, and tooth with a small 1.5 x 1.5mm piece of enamel missing soon. Morgan is going to be returning to the US tomorrow and will bring the specimen and a cast back, and I will bring the mold back when I return to the US in October, and can hand you the mold at SVP - this will be so I can make additional casts if necessary.
Post a Comment